- 2.1.1 Planning Practice - Introduction
- 2.1.2 Planning Practice - Setting goals
- 2.1.3 Planning Practice - Stages of a practice session
- 2.1.4 Planning Practice - Planning appropriate activities
- 2.1.5 Planning Practice - Duration of activities
- 2.1.6 Planning Practice - Using stations and group work
- 2.1.7 Planning Practice-Managing Physical and Psychological Load
- 2.1.8 Planning Practice-adding complexity
- 2.1.9 Review-Reflecting on practice
- 2.1.10 Creating a Positive Environment
- 2.1.11 Providing a Safe Environment
- Follow Up
- 2.3.1 Communicating with Athletes - Listen More, Speak Less
- 2.3.2 “Coaching on the Run” Technique
- 2.3.3 Providing Feedback
- 2.3.4 Changing behaviour with feedback
- 2.3.5 Conducting the Session - Organizing Players into Groups
- 2.3.6 Conducting the Session - Introduce the Activity
- 2.3.7 Conducting the Session - Observe and Give Feedback
- 2.3.8 Adaptive Coaching - Changing Activities to be more effective
- 2.3.9 Adaptive Coaching - Coaching Athletes of Varying Abilities
- 2.3.10 Adaptive Coaching - Including Athletes with a Disability
- Follow Up
- 3.2.1 Productive and reproductive approaches to coaching
- 3.2.2 Different approaches according to age of athlete
- 3.2.3 LTAD - making fun a focus
- 3.2.4 Games-based approach to coaching
- 3.2.5 Differing coaching styles to coaching
- 3.2.6 Communication styles
- 3.2.7 Holistic development - “athlete-centred” approach
- 3.2.8 Holistic development - teaching non-basketball skills
- 3.2.9 Holistic development - developing mindset and resilience
- 3.2.10 Holistic development - developing self confidence
- 3.2.11 Holistic development - developing self control
- Follow Up
- 2.7.1 Basic shooting - introduction
- 2.7.2 Basic shooting - teaching lay-up footwork
- 2.7.3 Basic shooting - foundation for the shot - balanced stance
- 2.7.4 Basic shooting - grip on the ball
- 2.7.5 Basic shooting - "top of the shot" - releasing the ball
- 2.7.6 Basic shooting - shooting off the dribble
- 2.7.7 Basic shooting - jump shot
- Follow up
- 2.8.1 The Importance of the First Step
- 2.8.2 Getting post position
- 2.8.3 Drop step
- 2.8.4 Drop step - counter move
- 2.8.5 Basics of perimeter offence
- 2.8.6 Drive fake moves
- 2.8.7 Shot fake moves
- 2.8.8 Catch and shoot
- 2.8.9 Penetrating off the dribble
- 2.8.10 Activities to practice offence in low post
- 2.8.11 Activities to practice perimeter offence
- Follow-Up
- 1.1.1 Matching up - basic principle of man to man defence
- 1.1.2 Distance from opponent
- 1.1.3 Defending one pass away
- 1.1.4 Flat triangle position
- 1.1.5 Stance - denial or open
- 1.1.6 Moving on the pass
- 1.1.7 Help defence - split line defence
- 1.1.8 Help defence - help to defend dribble penetration
- 1.1.9 Help defence - helping the helper / defensive rotation
- 1.1.10 Defensive communication
- 1.1.11 Transition defence
- 1.1.12 Full court man to man defence
- Follow up
- 1.2.1 Defending off ball screens – “lock and trail”
- 1.2.2 Defending off ball screens – “under”
- 1.2.3 Defending off ball screens – “through”
- 1.2.4 Defending off ball screens – “switch”
- 1.2.5 Defending on ball screens – “under”
- 1.2.6 Defending on ball screens – “over”
- 1.2.7 Defending on ball screens – “through”
- 1.2.8 Defending off ball screens – “switch”
- 1.2.9 Defending on ball screens – “double”
- Follow up
- 2.1.1. Motion offence - 5 out - dribble entry - hand-off
- 2.1.2 Motion Offence - 5 Out - Replacing the Cutter
- 2.1.3 Motion Offence - 5 Out - Purposeful movement - timing and spacing
- 2.1.4 Motion Offence - 5 Out - Ball Reversal
- 2.1.5 Motion Offence - 5 Out - Dribble Penetration - Receivers’ Principles
- 2.1.6 Motion Offence - 5 Out - Dribble Entry
- 2.1.7 Introducing Screens - 5 Out - Pass and Screen Away
- 2.1.8 Scrimmage Activity
- 2.1.9 Allowing Creativity in Decision Making
- Follow up
- 2.2.1 Off Ball Screens - Role of Screener - Setting the Screen
- 2.2.2 Off Ball Screens - Basic Cuts of Screen - Straight Cut
- 2.2.3 Off Ball Screens - Basic Cuts of Screen - Curl Cut
- 2.2.4 Off Ball Screens - Basic Cuts of Screen - Back Cut
- 2.2.5 Off Ball Screens - Basic Cuts of Screen - Flare Cut
- 2.2.6 Off Ball Screens - Role of Screener – Pop or Roll
- 2.2.7 Off Ball Screens - Down screens
- 2.2.8 Off Ball Screens - Up screens
- 2.2.9 Off Ball Screens - Back screens
- 2.2.10 On Ball Screens - Dribbler Options
- Follow up
- 2.3.1 Basic Fast Break - Starting the Break
- 2.3.2 Basic Fast Break - Running Wide Lanes
- 2.3.3 Basic Fast Break - Pass the Ball Ahead
- 2.3.4 Basic Fast Break - 2v1 Fast Break
- 2.3.5 Basic Fast Break - 3v2 Fast Break
- 2.3.6 Basic Fast Break - Moving into Offence
- 2.3.7 Activities to Practice Fast Break Principles
- Follow up
Level 1
2.7.5 Basic shooting – “top of the shot” – releasing the ball
“Top of the Shot” – Releasing the Ball
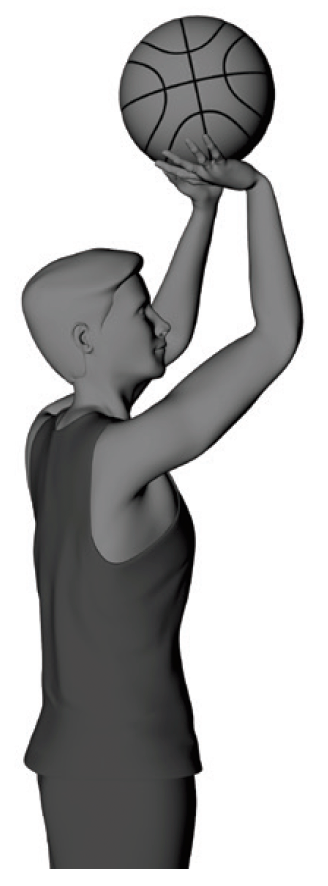
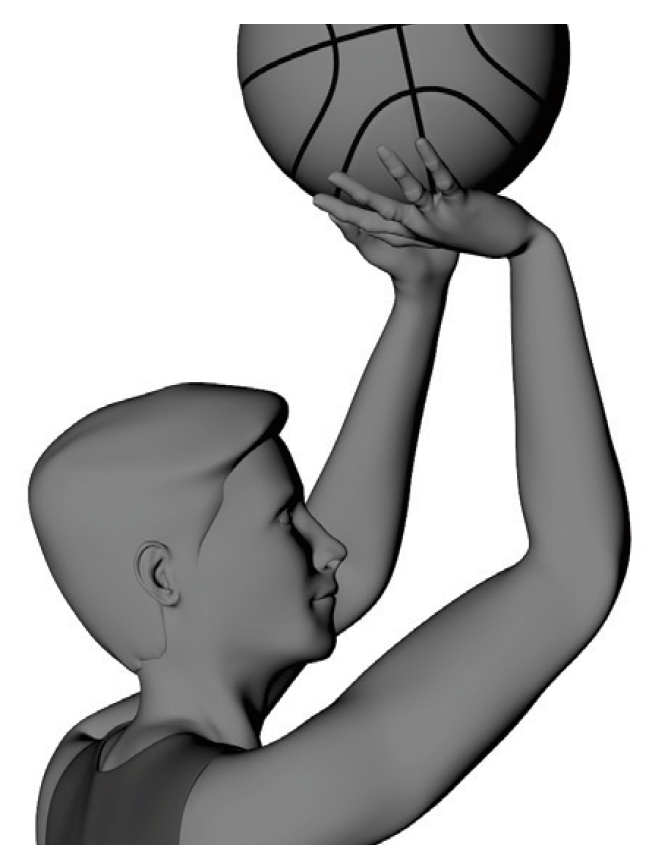
The higher the arc of the ball, the higher the probability that it will go into the basket. This is facilitated by having a “high release” point – elbow above eyes.
The shooting hand is underneath the ball, as is the elbow.
In the course of shooting, the player should look underneath the ball, not over the top of it, to sight the target.
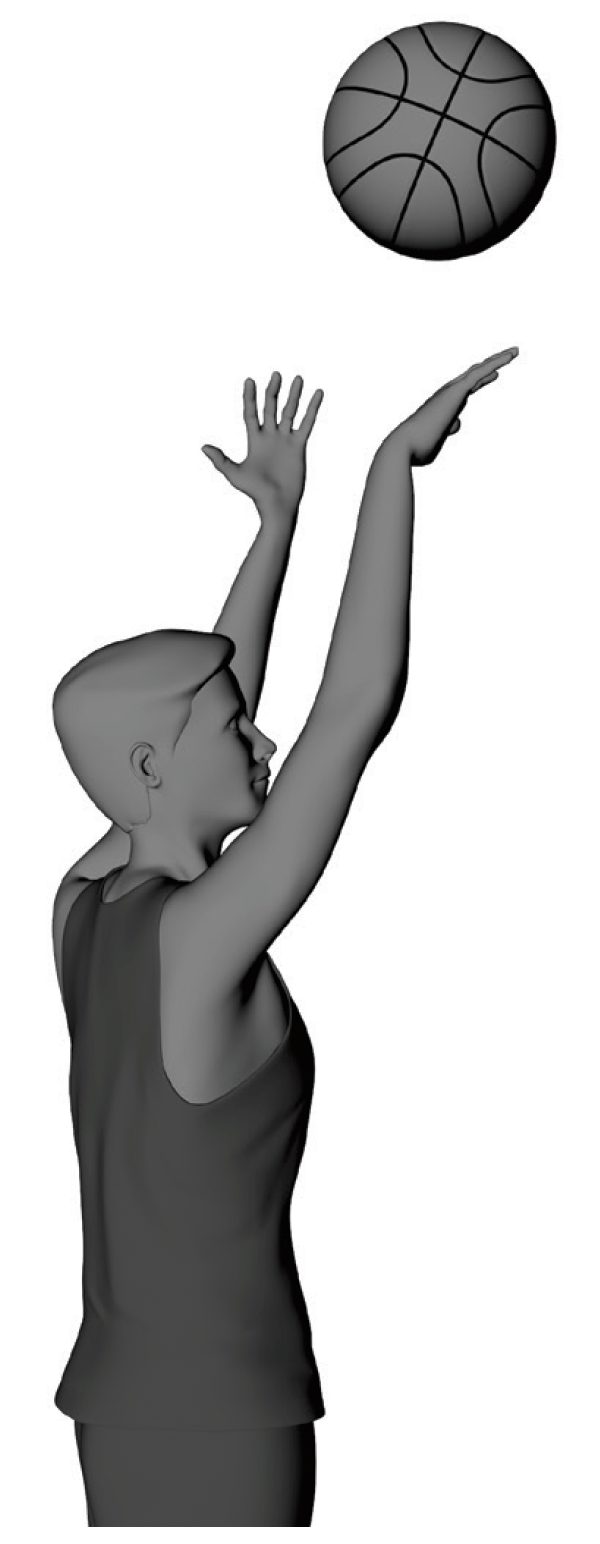
The arc of the shot is enhanced by the ball spinning backwards in flight. As the ball is released, the player should flick their wrist, putting spin on the ball.
This flick is a relaxed movement. The fingers of the shooting hand should remain spread and not squeezed together. The only movement is in the wrist.
The other hand simply releases from the ball – it should not push the shot at all.
Teaching a “Fluid” Shooting Style
Whether a shot is taken after dribbling or after catching the ball, the shot will usually start at approximately hip height. Many players have a habit of pausing in their shot technique at their forehead, which is often the result of practicing the “form” of their shot from that point.
This type of “concept” shooting can be valuable as the player learns to push up to a high release point, however, equally important is having a “fluid” shot technique without a pause. Any pause will both slow the release of the shot (which makes it harder to shoot under defensive pressure) and may also reduce the power that comes from the legs.
A simple method to practice a fluid shot technique is:
- The player stands on the “no charge” circle, facing “side-on” to the basket.
- If the player shoots right-handed, their left shoulder should be closest to the basket. The opposite applies for a left- handed shooter.
- The player starts with the ball in the “shooting pocket”, as if they have picked it after dribbling. Their shooting hand should be behind the ball, with elbow pointing behind them. Their non-shooting hand is on the side of the ball.
- The player makes a 90° forward pivot, which will have them facing the basket.
- A right-handed shooter will step with their right foot and a left-handed shooter steps with their left foot.
- As their stepping foot lands, they push up with their legs and lift the ball as high as possible, finishing standing with their heels off the ground. The shooting hand should be underneath the ball and the non-shooting hand on the side of the ball. This “release point” should be as high as possible.
- After a few repetitions without releasing the ball, the player then shoots the ball – jumping into the air if they wish.


